Last month (December PropTalk) the author detailed his journey of buying his dream used boat, a Chaparral 2550 SX, only to discover engine troubles as soon as he got home. In this article he begins the process of repairs.
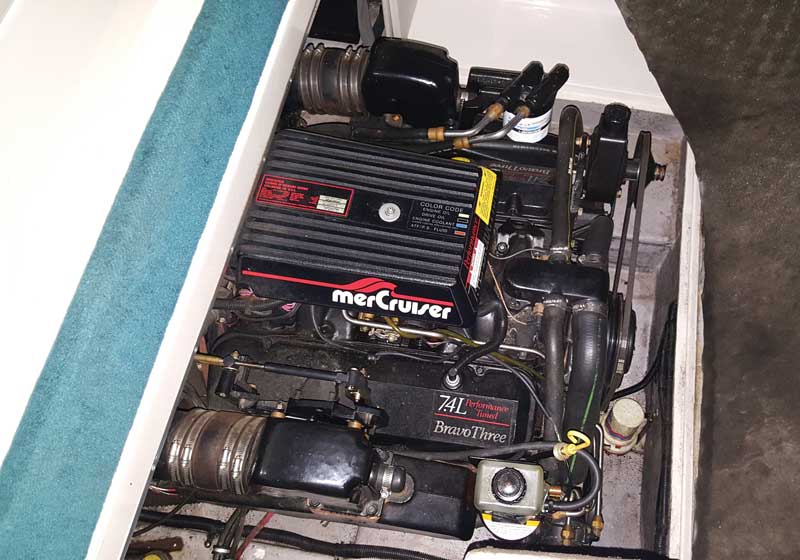
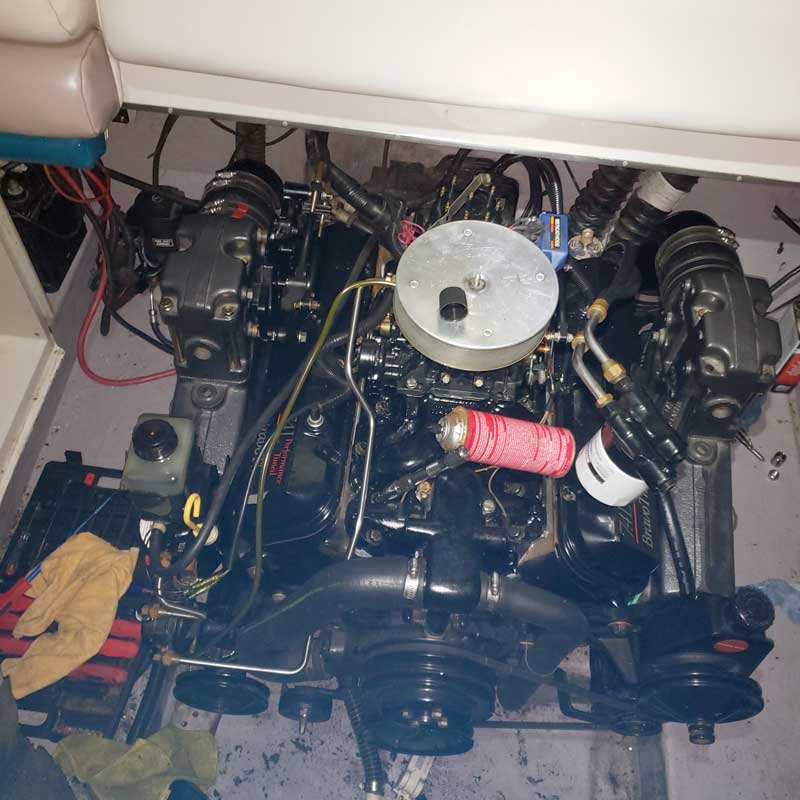
The first task was to conduct a simple compression test, which showed that two cylinders on the starboard cylinder bank were down to very low compression of around 20 PSI, while two cylinders on the port side were around 120 PSI, indicating a likely blown and/or warped head gasket respectively. On a typical used Mercruiser 454/7.4L big block GM marine engine, one wants to see compression of around 145-150 PSI on all cylinders. With these results recorded, it was time to begin the onerous task of tearing down the engine.
Head Gaskets
The first step was to remove the exhaust manifolds, risers, and all the accessories bolted to them. After this series of tasks was complete, I unbolted the intake manifold and valve covers. Then I disassembled the valvetrain, including the rocker arms, push rods, guide plates, and flat tappet lifters, being sure to store all nuts, bolts, and fasteners in labeled zip lock bags for a much less painful reassembly. With the exhaust, intake, and valvetrain out of the way, I was able to unbolt the exceptionally heavy and unwieldy cylinder heads from each side of the motor, taking care to place them in designated cardboard boxes resting on the swim platform for safe storage and transit to the machine shop, where the heads would be disassembled, cleaned, and rebuilt with new valve stem seals. I also bagged the rocker arms, push rods, and guide plates for transport to the machine shop for a closer inspection by the machinist. Upon removing the heads, my suspicion of a blown head gasket was confirmed!
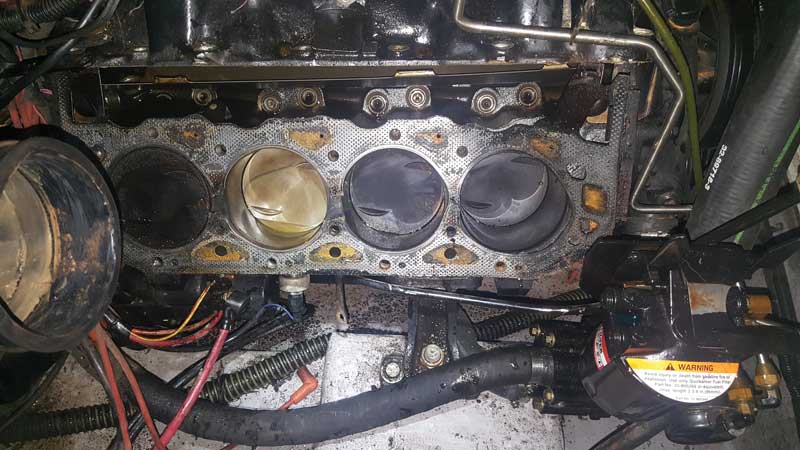
Head gaskets ‘blow’ for various reasons, including age, but more often than not it is due to an overheat event—and John had insinuated that such an event had occurred to Grape Expectations. In our case, the head gasket blew between cylinders four, six, and eight. The piston in cylinder six, once exposed, was completely silver and devoid of all carbon build up. It was clear that a minuscule amount of water had been seeping into the number six combustion chamber while the engine was under load in gear on the water, essentially ‘washing’ the piston clean. With this revelation, the source of the mysterious popping noise was determined to be caused by the number six cylinder attempting to compress water. Since water does not compress, it was reverberating back through the intake valve, into the intake manifold, and out of the carburetor, causing both a backfire as well as a slight misfire. Nonetheless, once the motor was apart, the rotating assembly was carefully inspected and rotated by hand and it was determined that the bottom end of the motor had been spared any apparent damage. Therefore, all that was needed was a top-end overhaul. With the condition of the motor now known, the cylinder heads were transported to the machine shop to be overhauled while I pursued other tasks.
Wet Exhaust System
With the heads at the machine shop, I began to browse online marine parts retailers for a new wet exhaust system. On the typical marine petrol engine, the cast iron exhaust manifold and risers are the weakest link in what is a fairly simple and robust propulsion system. The way the system works is that exhaust gases are drawn from the cylinder head’s exhaust port into the exhaust manifold after being compressed out of the combustion chamber by the piston. As one may imagine, these exhaust gases are exceptionally hot and must be cooled before being evacuated from the fiberglass vessel. Therefore, the exhaust manifold contains a water jacket where cool water from the sea cools the gases being exhausted from the engine. This system is known as a marine raw water-cooled exhaust system.
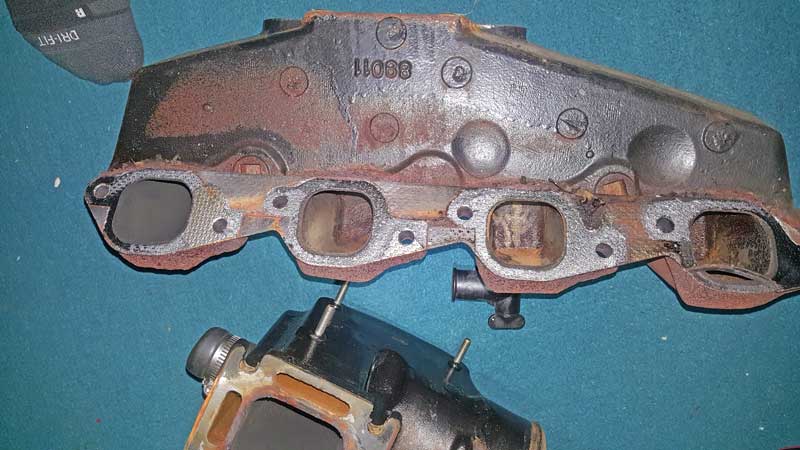
Bolted to the top of the exhaust manifold is the exhaust riser, which rises the mixture of exhaust gases and cooling water above the static water line before evacuating the gas and water mixture overboard through what is often called the ‘Y-pipe’ which, in the case of a typical petrol or diesel sterndrive, then directs the exhaust flow through both the transom assembly and propeller hub.
The typical failure points in this system include the water jackets in the exhaust manifolds and the gasket joint between the exhaust manifold and riser. In either case, the result is the same: if either of these trouble areas fails, water reversion from the wet exhaust back into the cylinder with an open exhaust valve will occur, likely resulting in the catastrophic engine failure event known as ‘hydrolock.’ This occurs when a piston attempts to compress water (which as has been said, does not compress), likely resulting in severe damage to the piston connecting rods (bending or breaking, typically resulting in rod knock).
For all I knew, our existing raw water-cooled exhaust system was original to the engine and boat, and I was not about to put a 25-year-old cast iron wet exhaust back on what would essentially be a brand-new motor after the rebuild was complete. Replacement exhaust manifolds and risers are made by many different companies, but common brands include GLM, Sierra, Barr/Osco, and OEM. Before pulling the trigger on a GLM exhaust manifold and riser kit for our 454 big block, which runs about $800 new these days, I came across a set of Osco exhaust manifolds and risers on Facebook Marketplace listed at $500. After a bit of haggling over the phone and an hour drive to Solomons Island, MD, I had procured a high quality new old stock marine exhaust system for our boat for only $400!

With the new exhaust system secured, I decided to replace our absent ‘exhaust flappers,’ which reside in the aforementioned ‘Y-pipe’ and prevent water reversion in the case of a sudden engine stall or forceful reverse maneuver. After this was complete, I cleaned and thoroughly scraped the engine block surfaces to remove all old head gasket residue in preparation for reassembly.
While I waited for the machine shop to finish the heads, I went ahead and replaced the drain plug, repaired a myriad of gelcoat blemishes, re-bedded all screws and fasteners in the engine compartment (to prevent future rot), and installed two grease fittings to allow for the greasing of Mercruiser’s carbon steel steering pin. In the interim, we also rechristened the boat as Soul Rebel, in honor of the late Bob Marley and one of his best and most spirited (in our estimation) songs. After about a month at the machine shop, the cylinder heads were good as new and ready for pickup and re-installation!
Reassembly
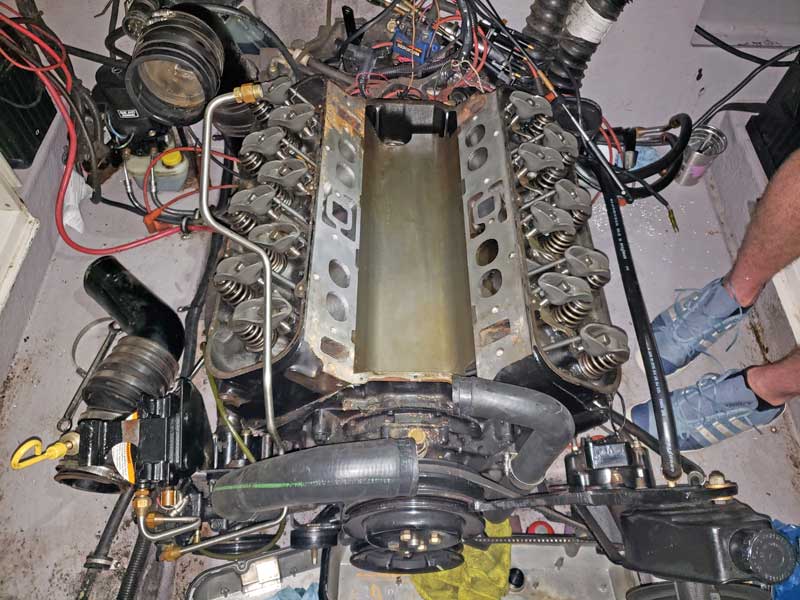
With the machined heads in hand, I installed the new head gasket and allowed the starboard head to rest on its engine block dowel pin. I then began the onerous task of fastening the starboard head via the Mercruiser prescribed torque sequence, which calls for three rounds of installing and fastening the head bolts in a specific order, ending up at about 65 or 75 pounds/foot, per short bolt and long bolt respectively. To help the bolts thread through the block without issue, I greased the new bolt’s threads, in addition to making sure the block threads were free of rust and debris. Though it took all night, I was able to get the starboard side torqued down without issue, and I proceeded to reinstall the push rods, rocker arms, and valve guide plates, before moving to the port side of the motor.
Work was going swell on the port side, and I was nearing the end of the laborious and intensive torque procedure, when, all of a sudden, and on the second-to-last bolt, I suddenly felt the bolt that I was gingerly tuning to final specification begin to move without resistance. As luck would have it, that fateful head bolt snapped in the middle near where the thread began to meet the engine block. What this meant was an abrupt end to what had been, until this moment, a productive and fortuitous Fourth of July night. With the Maryland summer halfway complete, Soul Rebel’s splash date would be delayed once again while I fumed and ruminated over the next course of action. Surely, I didn’t have to take the 150-pound cylinder head back off and begin anew… right?
After a few days of decompression and mulling over possible solutions, I decided the only tenable course of action was to remove the head to get a better look at the broken bolt. The broken head bolt situation turned out, in the end, to be a bit anticlimactic. After removing the head, enough of the bolt remained above the engine block to spin the bolt out with a pair of vise grips. I was incredibly relieved. I then chased out the threads with a tap again to ensure the bolts would not have to overcome any additional resistance and placed the head back on its dowel pins to begin the torque sequence over again. To my consolation, the second time was a charm, and I am happy to report the port head was successfully torqued down without further incident.
After both cylinder heads and valvetrains were reinstalled onto the engine, I replaced the intake manifold and carburetor which was now dry after being painted with engine enamel and therefore ready for reinstallation. After the intake manifold was torqued down to specification, I reinstalled the valve covers, and it was at this moment I realized that our engine was starting to look like an engine again.
Over the coming days and weeks, I continued putting the engine back together piece by piece. After the intake, next was the distributor which was set as closely as possible to base timing, with the rotor pointing at the number one cap point while the engine’s number one piston was rotated to top dead center (TDC) before the heads were reinstalled. After this, new spark plugs and plug wires were installed followed by the new exhaust manifolds and risers. A new impeller and thermostat were also fitted, only after broken impeller pieces were fished from the engine’s oil and power steering cooler. This was done to ensure the new engine had an ample supply of cooling water to prevent hot spots between cylinders from forming. I also installed new V-belts on the engine pulleys, replaced the fuel tank’s anti-siphon valve, replaced the fuel filter, and changed the engine oil and oil filter to ensure the rest of the summer of 2020 would be trouble-free—which, spoiler: it was relatively so. With the engine fully back together, the long-awaited moment of reckoning was here: would my DIY top-end rebuild be good enough?
Moment of Truth
Ready to start the engine and work out the kinks under load, we had the boat placed in the water by the marina. After priming the engine with fuel by cranking and cranking and cranking, while simultaneously pumping the throttle to open the carburetor choke and create a greater induction of air and fuel into the carburetor’s body, the engine roared to life!

I allowed the engine to warm to temp, while I checked for water and oil leaks, of which I found none. I did, however, notice a small drip of fuel where a metal fuel line threaded into the carburetor body, which I promptly remedied with Permatex Fuel Resistant Sealant. To this day, this product has successfully sealed the old brass threads. After the engine warmed up to temperature, it began to surge in RPM because the ignition timing and idle speed and mixture screws were improperly adjusted. Over the next couple of hours while the boat idled at the dock, I set the base timing to eight degrees BTDC with a timing light, a wrench, and a careful hand. After the timing was set, I adjusted the idle speed screw to set the idle speed RPMS to the correct range of 600-750 RPMS under load. It seemed to me from the sound of the engine, as well as the smell of the exhaust, that the idle mixture was close enough, if not perfect, so I did not fool with adjusting it after all.
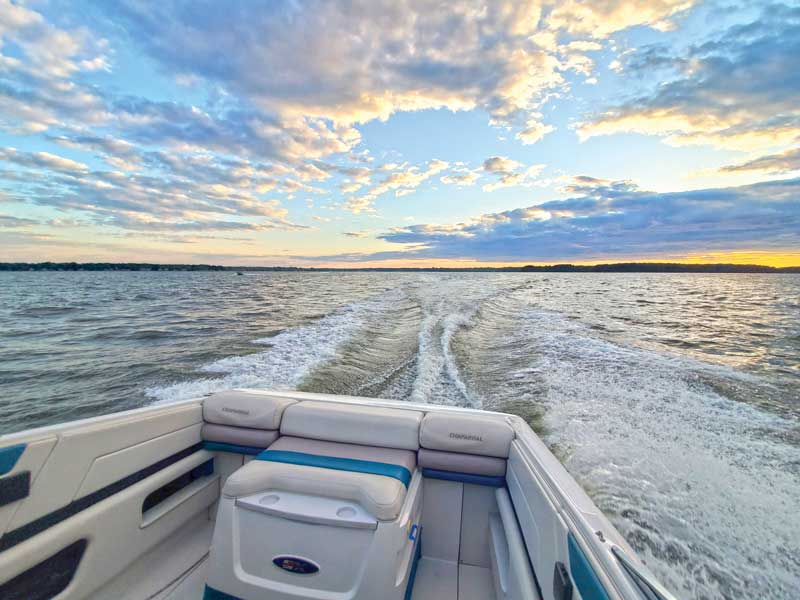
While it was nearing 7 p.m. on that hot and sticky July evening, we were able to leave the slip and put the boat through its paces on the typically raucous Chesapeake Bay, which was uncharacteristically calm as if for the occasion. While I was extremely apprehensive dropping the hammer the first time, I am happy to report that the 454 Mercruiser purred and performed admirably that day—and in the nearly 100 hours since overhaul! While there were additional kinks to work out with Soul Rebel, including a stalling problem that necessitated the installation of a new mechanical fuel pump, in addition to a failing plastic throttle shifter that had to be replaced, it is with great pride and joy that I pronounce the top-end engine rebuild of 2020 a resounding success!
By Drew Maglio