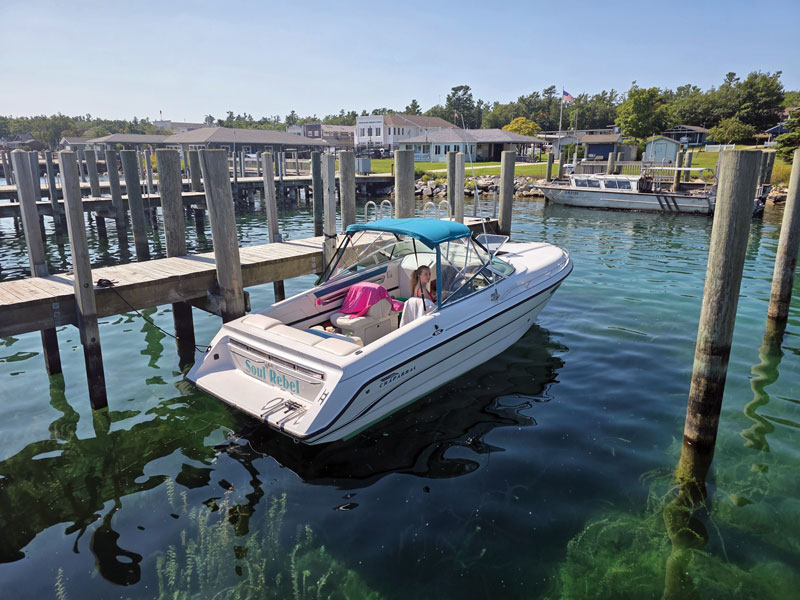
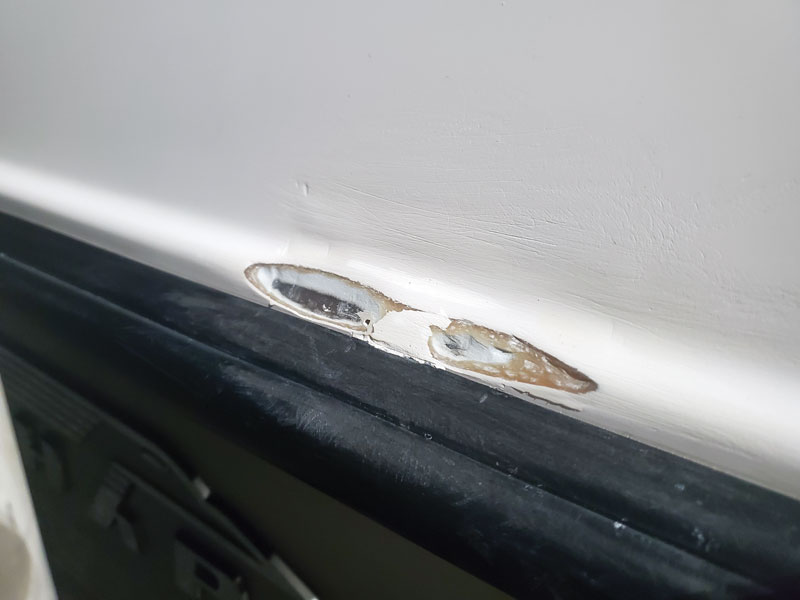
Our narrative now picks up from our last iteration, “Adventures in Boat Repair Part I: Shattered Dreams,” during late summer, 2023 when I trailered Soul Rebel back from the Upper Peninsula of Michigan to her homeport of Shady Side, MD. (Check part one at proptalk.com/shattered-dreams-adventures-boat-windshield-repair.) Content with the summer’s fun, I decided it was high time to deal with one of Soul Rebel’s niggles that had annoyed me greatly since I purchased her in 2020, namely a substantial gouging of her gelcoat on the port stern quarter, presumably from a previous owner backing her into a dock. Upon undertaking this project, little did I know that the repair journey—exacerbated by tumult in our personal lives during this time—would take almost two years to fully complete to satisfaction!
Can of Worms
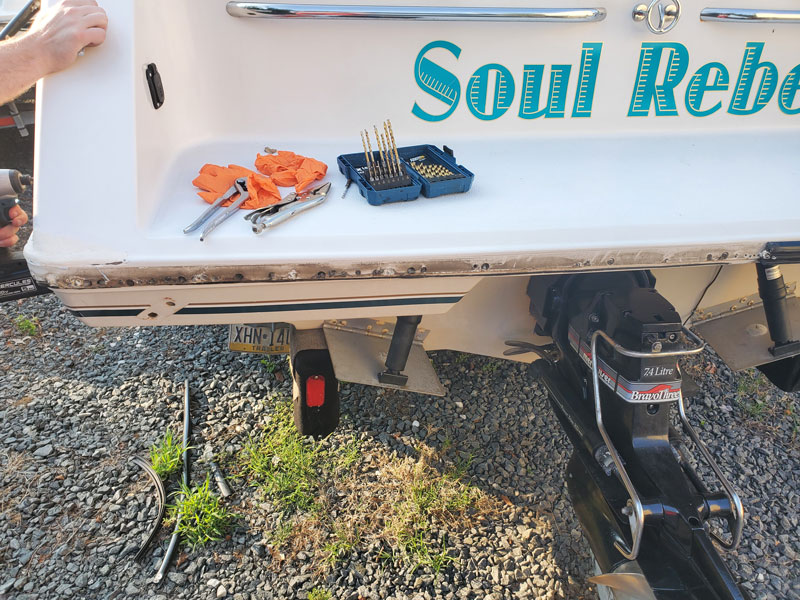
It is a first principle of boat repair that when one dares to open up a can of worms, one must be prepared—mentally, practically, and fiscally—to deal with whatever comes one’s way. Upon removing the rubrail from the port stern transom of Soul Rebel—where the two halves of the “shoebox” construction fit together (and were bonded and fastened)—I had to be mentally prepared for whatever carnage lay below, obscured from plain view.
Still, knowing the likelihood of such matters theoretically is decidedly different from experiencing the reality of such problems. And so it was, as I went to repair one thing, I first had to repair quite another.
Nonetheless, after a brief reprieve (during August of 2023), I made it down to Shady Side and began disassembling Soul Rebel’s rubrail. I did this by removing the insert and then drilling out the rivets which fastened the hard-plastic base to the boat. As I worked, I peeled back the surprisingly flexible base and insert-holder from the vessel, revealing more and more of what was to come.
How Production Boats are (Supposed to be) Built
For those who do not know, a typical production boat is built in two or three large sections which are then adjoined together—either through mechanical fastening (i.e. nuts and bolts, screws, or rivets) or chemical bonding (fiberglass tabbing or a structural adhesive such as Plexus/MMA). In the case of our boat, it was principally formed of two-halves: namely the hull section—interlaid with encapsulated marine-grade plywood stringers and bulkheads, which were bedded with polyester resin putty, and later encapsulated with fiberglass and tabbed to the hull while in the mold—and the “top-cap” or deck—which simply was a separately molded structure that was later fastened to the hull at the hull-deck joint with aluminum rivets every few inches on average, over which the rubrail was laid and secured. And so, while my plan was to repair a few areas of thoroughly gouged gelcoat near the rubrail itself, I had to remove the rubrail to repair the gelcoat properly.
And in so doing, I was presented with a startling reality: I had revealed something long hidden about my boat that can truly only be appreciated with the eyes. It became clear that I would have to repair the hull-deck joint itself before any gelcoat repairs could even be contemplated. As a result—and a bit discouraged—I covered Soul Rebel and went home to Annapolis to research and contemplate my next steps.
When In Doubt, Hire It Out?
For the first time in a while, I was out of my depth: while I had mastered general boat and engine repair, including electrical revamping and installation, my glasswork had always left something to be desired. Sure, I had partially rebuilt a 1998 Sea Ray Sundancer 270 that had three rotten stringers, a partially rotting transom, and a rotten aft dividing bulkhead—but that was different: it was structural glasswork that could be painted over and left as-is once complete. This burgeoning project was different: it required a two-fold perfect and professional blending of structural repair techniques, with the delicate prowess required to achieve near-factory cosmetic finish work.
So, if you’re wondering what I did, I of course called in a true professional—right? Wrong!
I decided it was high time I learned to master the art of gelcoat repair. And reflecting upon these labors, I am glad that I stubbornly persisted in that decision even when things looked bleak.
Let the Games Commence…
I headed back out to the boat to further assess the situation and proceed with the deconstruction. One project that was lopped on was to remove and rebind the transom’s stern eyes, used for towing—which I suspected were leaking, as water liked to mysteriously collect behind the interior (encapsulated) transom structure, in two small compartments molded into the bottom hull to support the swim deck. Thus, in short order, the stern eyes were removed, and I found they were indeed leaking, but luckily the backing material (plywood) was only damp but not the least bit rotted.
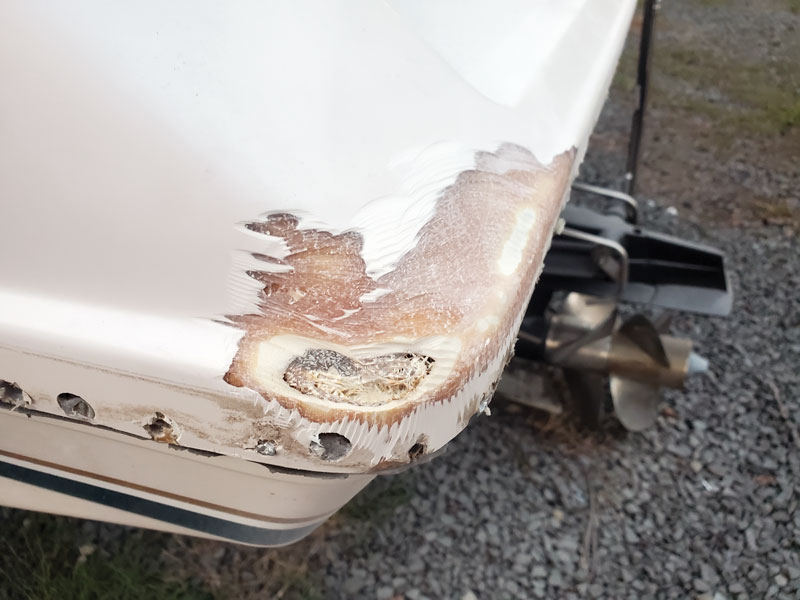
Removing the rubrail further along both sides, I was confronted with a startling, grisly reality: the carnage that was the attempt at adjoining the top-cap to the hull continued along the port side, almost to amidships. In this section, far too many holes were drilled, the glass cloth was dry and brittle (obviously not properly “wetted out” during construction), and there were many permeations in the vessel that could potentially leak.
With the rubrail insert and base out of the way and secured, I left. When I came back, I broke out the drill and decided to go to town on the many poorly installed rivets; I had previously determined to drill and fill any questionable rivet or unsealed hole in the immediate vicinity. My tentative plan was to use a structural epoxy, with great adhesive and compressive properties in addition to flexibility, applied via caulking gun. For such a task, I selected TotalBoat’s Thix-O, a thickened epoxy that doubles as a structural filler and adhesive. In a pinch, I also substituted West System’s G-Flex, but found it to not work as well in this scenario.
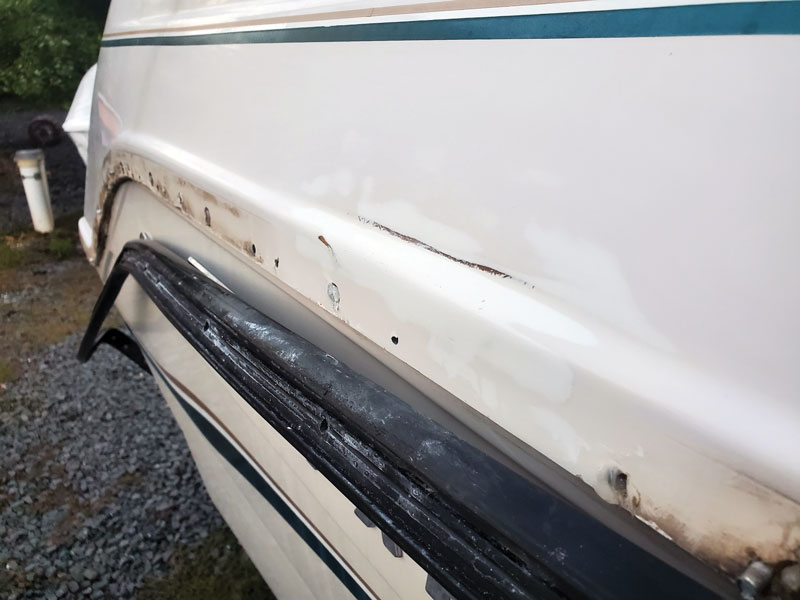
Drilling and filling holes would seem simple enough—and in some respects, it was—but I had to ensure that I did not get epoxy anywhere it could prevent the proper adhesion and application of polyester gelcoat thereafter. And so, I taped all the surfaces, drilled and filled the holes, and otherwise used the injectable epoxy-fillers to fill, fair, and rebuild any questionable fiberglass structures at the hull/deck and rubrail junction. Before attempting such a task, I had gone around the boat with a Dremel equipped with a stone wheel to remove any loose (or dry) bits of fractured fiberglass. I then cleaned the surface liberally with acetone to ensure good bonding. I left the cover off that night and came back in a couple of days to check on things and was pleasantly surprised with how good of a job the epoxy truly did. The epoxy had not only filled the holes, but it had stabilized the whole shoddy construction. Once complete, I attempted to compress the structure and tapped it out with a ball peen hammer, and the whole composition was seemingly rock-solid.
With the “Hard Part” Done…
With the most arduous part complete, I proceeded to mark and drill holes for the application of new rivets to hold the boat’s two halves together. In lieu of aluminum, I employed stronger stainless-steel rivets for this application. Without much fuss, the rivets went in the joint—and before squeezing the trigger on my rivet gun, I sealed the end of each one with 5200 for extra insurance. Satisfied with the work to date, I went home.
In the coming weeks, I made further trips to begin cosmetic repairs of two sections just above Soul Rebel’s hull/deck joint—which had been the impetus for disassembling the rubrail in the first place. Spoiler: this half of the repair process, i.e. the “cosmetic,” proved to compose the lion’s share of the project when all was said and done.
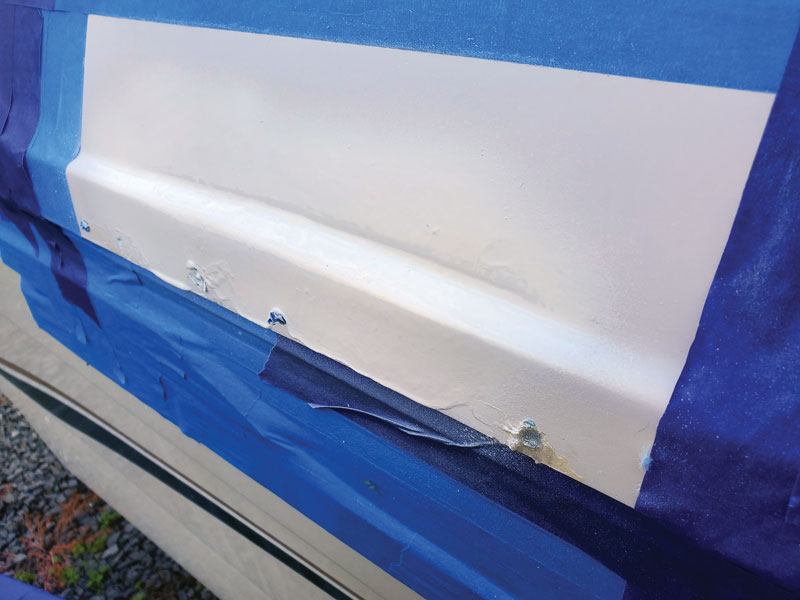
I will spare the reader a list of work sessions and dates, but suffice it to say, cosmetic repairs began in earnest during the fall of 2023 but were not fully completed to a satisfactory degree until September of 2025!
In the end, the project required many revisions, which consisted of some formulation of the following: fairing with P77 polyester fairing putty from AdTech (which had been recommended to me by a friend who is himself a professional fiberglass technician), before sanding and attempting to spray gelcoat thinned with MEK via a Preval, only to realize the underlying surface wasn’t completely perfect, necessitating further sanding and fairing, before more sanding. Did I mention yet that I hate sanding?
Nonetheless, I was helped greatly by the aforementioned friend, Vince Ternullo, who runs his own company in Stuart, FL, called Deep 6 Marine. Vince’s advice helped me pull through to the finish line after much frustration and for that, I am very grateful; but I do believe I did learn along the way the art of seamless fiberglass and gelcoat restoration.
Without getting bogged down in the monotonous details, nor sharing trade secrets, I did learn some basics that can aid me and others going forward:
- A faired surface must be completely fair and true before gelcoat is sprayed; not ensuring so caused me much frustration.
- Leave gelcoat color-mixing to the pros, as it is basically impossible to perfectly do so for aged white colors/derivatives. By the end, I was so desperate for a quality color match that I shelled out about $250 to purchase a quart of Chaparral’s OEM color, “Surf White,” offered by Spectrum Color, which was used on my boat and other 90s Chaparrals. The color, although brighter than the rest of the boat by a very small margin, is pleasing to the eye and does not stand out under direct sunlight. Before purchasing an exact color match, I had ruined about three batches of gelcoat attempting to mix the colors in myself via Vince’s recommended method(s). To me, the lesson herein is clear: “penny-wise, dollar fool,” aka, shell out the cash to get an exact match, rather than fumble about if you are going to DIY.
- To be sprayed via Preval, gelcoat must be very thin; and if requiring thinner, MEK is preferred over styrene because it does not yellow over time. Vince told me verbatim that if Styrene was used, the color may match at first before becoming an unsightly yellowed-white after about six months. In Maryland, I had trouble getting MEK thinner and had to order it from Canada.
- Gelcoat must be sprayed thin, and multiple coats are preferred over fewer thick coats. When spraying gelcoat early in the final stages of my project, I dealt with a lot of “orange peel,” poor adhesion, sags/runs/drips, and other surface imperfections which were later improved by spraying earlier in the day on days with less humidity, as well as applying a greater number of thinner coats, in lieu of fewer coats applied thickly.
- The repair area will end up being a lot bigger than anticipated, and nearby undamaged gelcoat will have to be scuffed up with at least 220 grit to accept “fresh” gelcoat for the blending process.
- Paint lines are only unavoidable if you make the repair area too small—that is to say one must not spray gelcoat near the hard tape edge or you risk a raised edge/paint line upon full curing.
- The finished gelcoat will still have to be progressively sanded, starting from 220, all the way up to 2000 grit before compounding and polishing; but many thin coats built-up on the surface and spread over a wide area make sanding a satisfying way (I can’t believe I am saying that!) to blend the repair area into the vessel’s surrounding gelcoat.
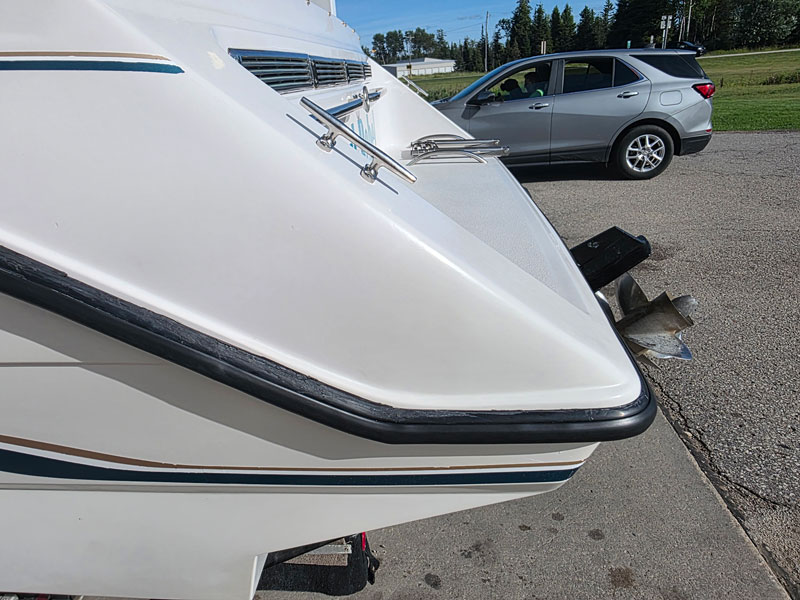
And so it was that the second—cosmetic—half of our vessel’s restoration was completed in the waning months of 2025. It was preparations such as these that made our three extended trips of 2025 all smashing successes. In such a case as this, I believe pictures speak louder than words, and that the fruits of my labors speak for themselves in images.
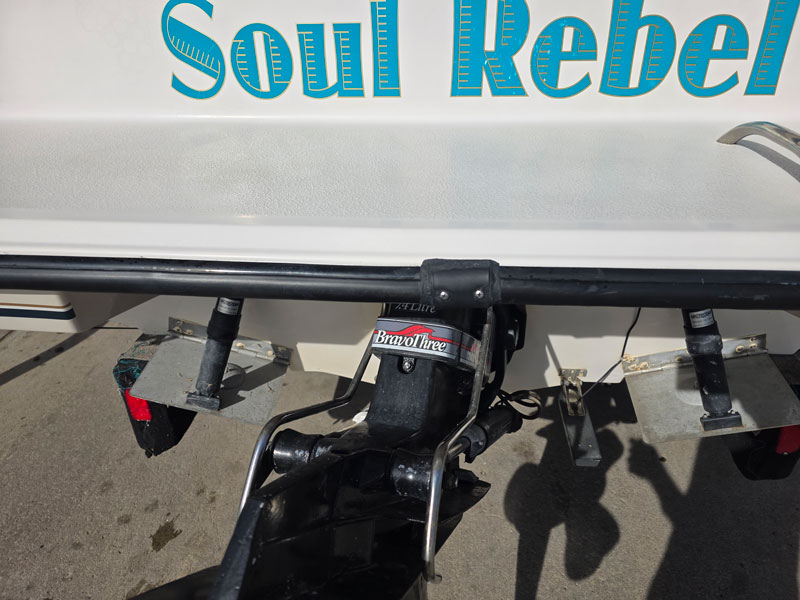
Through such a process, I found such a project to typify the “two halves” of boat ownership and restoration. It is two halves because our boat was principally built in two halves. It is two halves because the bottom, i.e. maintenance and repair, constitutes the necessary base and basis of boat ownership, and the activity of boating itself. And it is two halves because our summers of 2023 and 2025 were delineated by two halves: that of a heavier portion of work and toil and that of a lighter, even dreamy half, of unrivaled adventure and exploration from the decks of our beloved boat, Soul Rebel.
By Drew Maglio