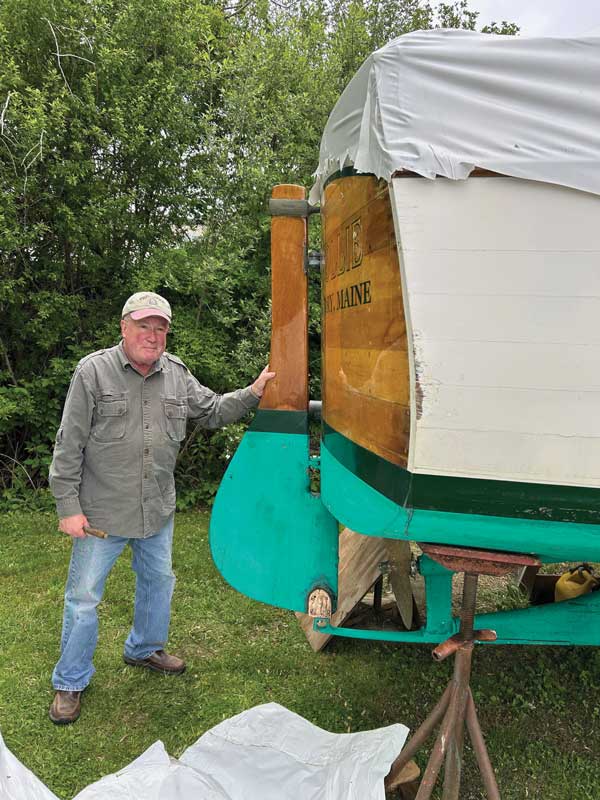
My 1928 vintage wooden powerboat, the Anna Mary, has an external wooden rudder mounted on the transom, a bit of a quaint design, but no doubt the style that her designer and builder, the late Albert Condon, wanted for her.
Albert, a mid-coast Maine man, designed her very long ago as a ‘Lobster Cruiser’ and built her to be a sturdy craft with character. But after time, as perhaps we all understand, everything wears out (something that I realized after buying her and bringing her back to my home in Narragansett Bay, RI).
The trip back to Rhode Island took four days, traveling during the day only, and covered well over 300 nautical miles. We had some bouncy weather along the way down the coast, and the rudder and steering system produced its share of rattling and odd, unpleasant noises. Halfway down the coast, I made a note that I would, when we reached Bristol Harbor, stick my head under the after deck and have a look around. If I saw something that was worn, loose, or needed repair, I would attend to it, as I am a D.I.Y. kind of boat owner anyway.
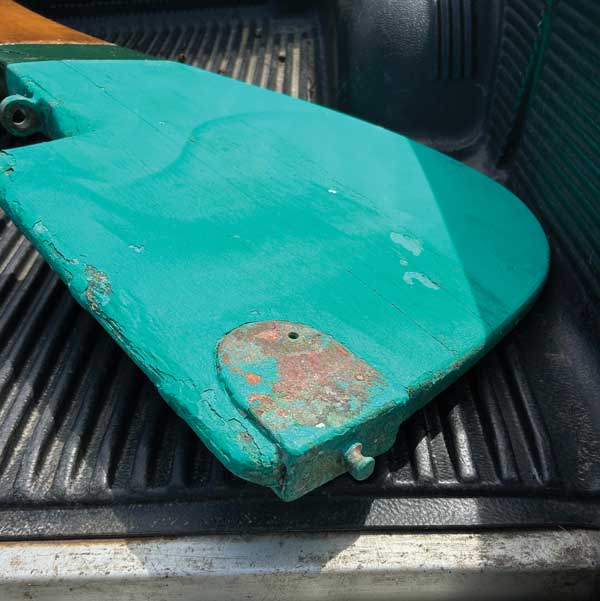
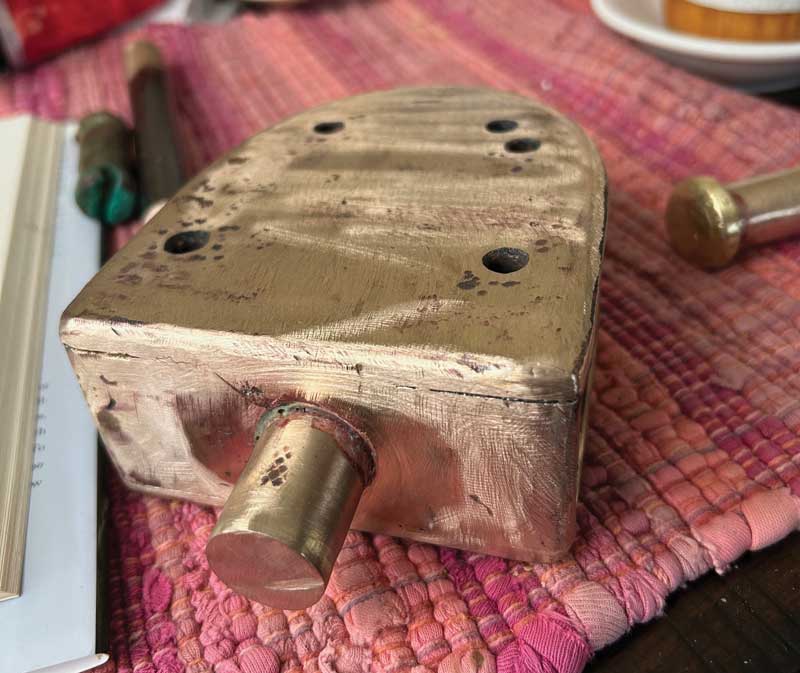
The wooden rudder of Anna Mary is attached to the transom with two sets of hinges, bound together by two strong clevis pins and cotter pins. All of the metal is bronze! Near the top of the rudder is mounted a cast bronze arm that forms the simple rudder quadrant that extends inside the transom and meets up with the blocks and steering cables that lead forward to the wheel. Simple enough. But at the base of the rudder is mounted a cast bronze saddle of sorts with a pin on the bottom that fits into a hole in a bronze skeg extending aft from the keel. This area sees the most stress and wear, because the rudder is mounted directly behind the propeller, directing the prop wash.
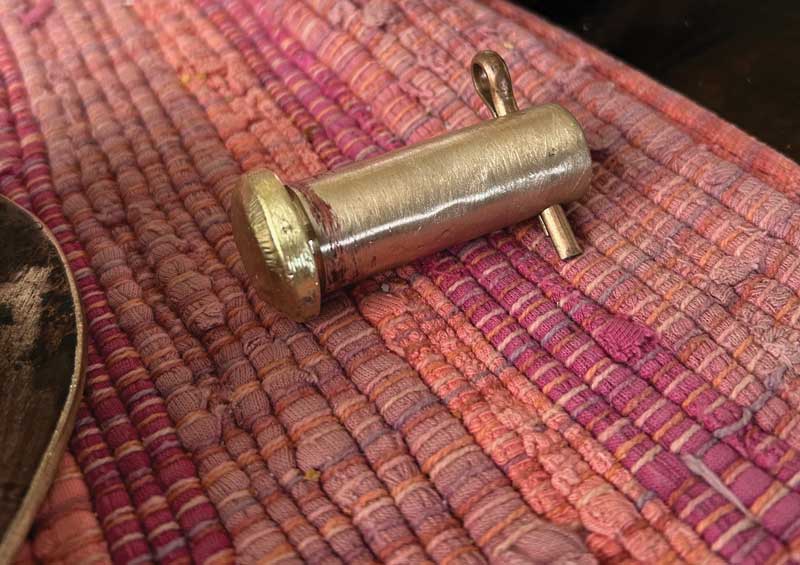
Bronze-on-bronze underwater has a self-lubricating quality, but this is original hardware and has had many years to wear. The pin at the bottom of the bronze saddle has had many decades to do just that. Metal on the bronze saddle pin that had worn away now needs to be built back up. We needed the art of a skilled metal worker familiar with Naval Bronze. I knew that I simply did not have the brazing skills to do the job. Even though Bristol is an old boat-building town, metalworkers here are more familiar, by far, with aluminum and stainless. ‘Who knows how to work with bronze?’ I asked myself. First mate Capt. Tom Bradford, who was also my business partner in this boat tour business, was also at a loss. “We need to find someone local who knows how to braze,” he said. In addition to the saddle, the lower hinge needed a new clevis pin, three-fourths in diameter, we determined, and where would we find that?
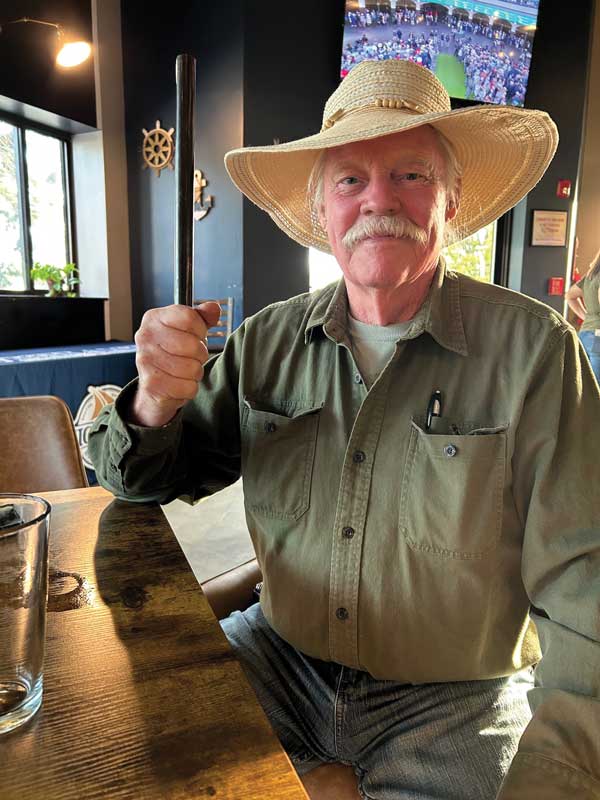
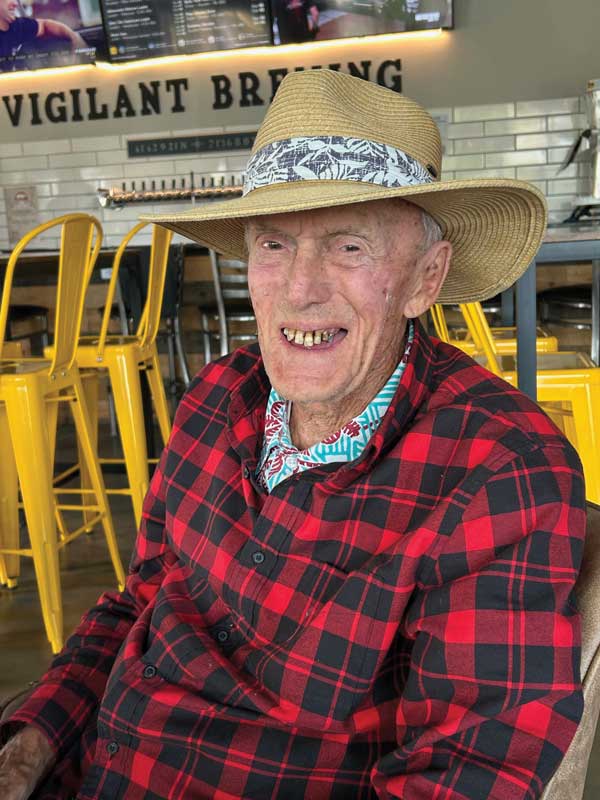
The first assistance came from an old friend, retired Navy Gunner’s Mate Tuffy Sanford, who also at one time ran a machine shop in town. He gave me a couple of pieces of Naval Bronze, insisting it was the right kind of bronze to use, something to do with corrosion resistance and tensile strength. Then, Capt. Tom found a Naval Bronze rod that was the perfect clevis pin diameter, three-fourths inches, at a shop in New Bedford. Then, Tuffy came through again. “There used to be this metals guy up on the back road,” he told me, and sure enough, we found Stewart Stanzione, a welder and metals specialist who knew how to work bronze exceptionally well, probably the best in town and possibly the only one in Bristol. Then, of course, we sought out the ‘Commodore’ himself, Halsey Herreshoff, grandson of the great Capt. ‘Nat’ Herreshoff, who agreed to supervise our project in exchange for a few draft beers from our local Vigilant microbrewery, situated in the nearby Bristol industrial park barely a stone’s throw from the boat. The place had become something of a hang-out for us, and it was popular among local boatbuilding and marine tradesmen.
Stewart refurbished the saddle, added a new, fatter pin at the base, and in the meantime, we removed the rudder and then fitted the hardware, old and new, back on. It was a relatively easy job; the saddle had been bolted through the rudder, but of course those old bolts had to come out in order to remove the old saddle for Stewart to work on it. When it was time to replace the saddle, we cleaned out the holes and used two thick tapered awls as guides to line up the saddle with the rudder. We then put the rudder back in position, inserting the lowest pin into the hole in the skeg, and the rest of the rudder came together into place as smoothly as you could wish, hinges and even the quadrant arm.
Capt. Tom hooked up the steering cables and we inserted the clevis pins into the hinges, along with the cotter pins that retained them, and found that the rudder moved snugly, smoothly, without looseness or rattling, as close to new as we figured we could possibly get nearly a century after the boat’s initial launch.
It’s a great strategy (and learning experience) to “Do-It-Yourself” with a traditional boat, but sometimes you might want to get additional help from others, especially skilled friends with decades of experience working with unfamiliar materials, and materials that might be a little hard to get. One can learn a great deal by reading up on the subject before lighting a torch, but there is no substitute for advice and a little help from old friends!
By Capt. Michael L. Martel