Perhaps the most difficult task for a boat owner is attempting to make paint adhere to metals that are subject to the adverse conditions found below the waterline. Throughout the course of many years of boat ownership, I have discovered and refined a painting process for underwater boat metals that works well and is able to be completed by a handy boat owner.
Step 1: Determine what is to be painted.
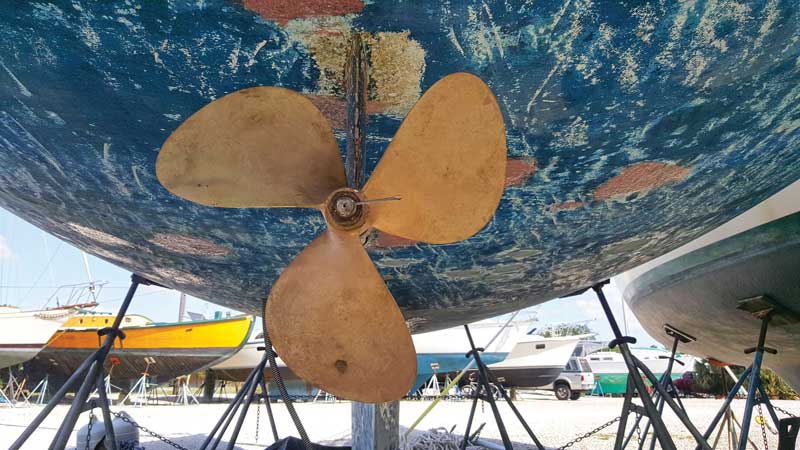
The first step toward a successful paint job is determining the type of metal to be painted. On a boat, most underwater metals are either aluminum or bronze and each respective metal requires a vastly different painting process. The former, in particular, is exceptionally difficult for paint to adhere to because of its chemistry, as aluminum and its derivative alloys are not considered a noble metal and therefore corrode easily. However, the corrosion process causes aluminum oxide to form on the surface of aluminum parts which makes the metal harder, stronger, and tends to slow further corrosion (except when submerged underwater which is an oxygen depleted environment). What makes oxidized aluminum precarious to paint, however, is that neither paint nor primer adheres well to aluminum oxide. Therefore, painting aluminum includes much sanding and a process known as chemical etching, whereby the oxide layer is converted (i.e. etched) via a chromate conversion process.
Etching is a nasty, complicated, and cost-prohibitive process for the average boat owner. The chromate conversion of aluminum is typically accomplished by washing aluminum parts with a chemical known as alodine. In essence, alodine bonds tenaciously to, and converts, the aluminum oxide layer into a substrate that will bond tenaciously to primer and paint. As the reader may gather by now, a professional quality paint job of a corroded aluminum part is an incredibly arduous task, which includes sanding, cleaning, degreasing, etching, priming, and finally painting. The sheer difficulty and labor required for such a process has led me to seek alternatives.
Step 2: Determine how much time is to be invested.
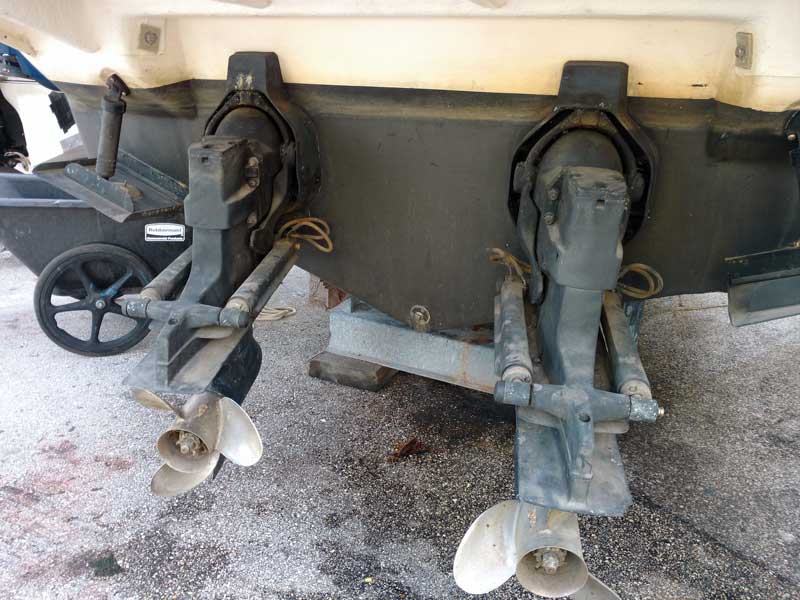
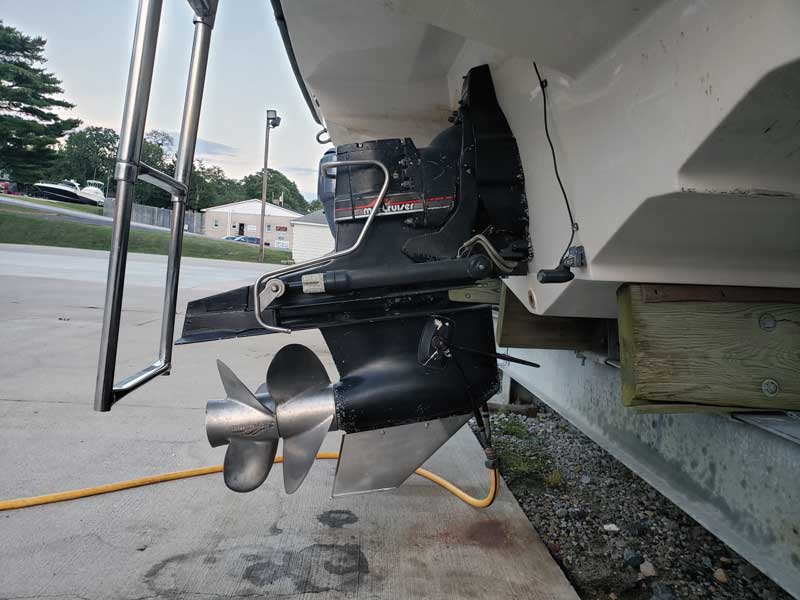
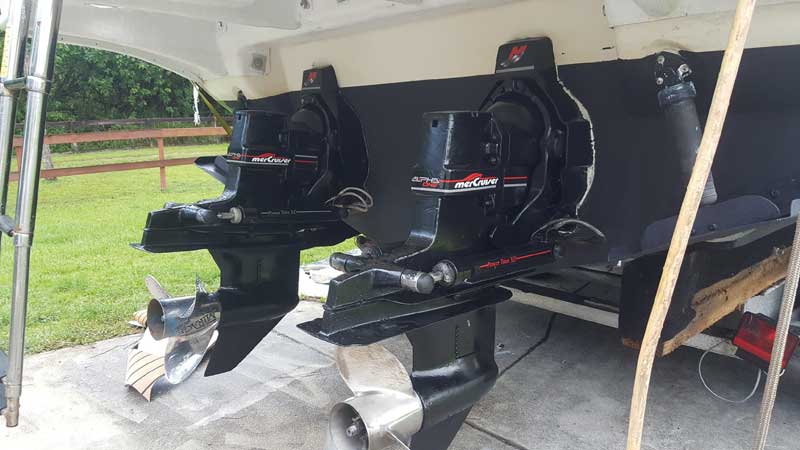
While a proficient amateur may be able to achieve a professional quality paint job, the time and toolage required to do so is prohibitive. I have found that despite my best efforts, a paint job for something like a sterndrive leg that moves through the water at over 35 mph lasts—at best—one year. Thus, the method that I am going to detail below is one suitable for handy boat owners who do not wish to dedicate the time, effort, and money required to achieve an OEM paint finish. Doing so in an uncontrollable environment (as would be found in a typical boatyard), typically results in frustration and only marginally better results due to the inherent difficulties of preparing surfaces perfectly in the face of a multitude of airborne contaminants exacerbated by wind, humidity, etc.
Step 3: Accept that the painting of underwater metals is routine maintenance and not a one-time project.
The only exception to this rule is of course, a professional factory paintjob which entails extensive sanding, etching with alodine (if aluminum), washing, fairing, priming, and finally applying two or three coats of a hard and tenacious (albeit extremely toxic to inhale) two-part polyurethane paint (like Dupont Imron) via spray gun. With that said, the steps to achieving a presentable paint job are outlined below. While my painting methodology will provide some level of corrosion protection for metals immersed in saltwater, installing properly bonded aluminum or zinc anodes (for saltwater) will abate electrolysis and galvanic corrosion (from stray current in marinas) to a much greater degree.
Step 4: Preparation
Typically, if one is to paint something, its current coating of paint has worn and/or flaked off. In such a case, I recommend soaking the metal to be painted with degreaser before power washing. Afterwards, a light sand to smooth the surface and remove any remaining paint flakes, followed by another wash with degreaser or solvent is necessary. After allowing the metal surface to dry completely, it is time to prime.
Step 5: Primer application
For priming underwater metals, there are a plethora of options including spray can zinc chromate, liquid epoxy primer, and various barrier coatings made for underwater metals. If painting aluminum however, the only viable option without etching with alodine is zinc chromate (or zinc phosphate if unavailable due to local environmental regulations). Zinc chromate, which typically is green or yellow in color, bonds fairly well to aluminum—lightly corroded or otherwise—as it contains chromate which etches the aluminum oxide to allow it to accept paint. Professional critics would be correct to point out that self-etching primers—of which zinc chromate is the best—are not ideal because etching primers cure with some level of surface contaminants in the primer layer which theoretically impacts paint adhesion. In practice, I have not found this to be the case to a discernible degree. Nonetheless, I recommend applying two even coats of zinc chromate to all aluminum parts to be painted.
For bronze, stainless, and other underwater metals, an epoxy barrier coat made for priming underwater parts would be a better choice, but for aluminum only zinc chromate will suffice without completing the extensive alodine etching process outlined above first. If one decides to treat aluminum parts with alodine first, an epoxy barrier coating may be used on aluminum as well.
Zinc chromate typically comes in a spray can, while a two-part epoxy primer will generally have to be mixed in the proper ratio before being applied via roller, brush, or spray gun. Whatever method one employs will depend on what one is painting. In most cases, the manufacturer’s directions should be followed as closely as possible. For the zinc chromate on aluminum method, the two coats should be applied within an hour of one another in order to achieve a chemical bond. If this is done, sanding between coats—with the exception of runs and drips—is superfluous. Because zinc chromate cures into a powder that dries quickly, it will generally be ready to accept paint soon after application. The reason I recommend two coats is to seal and protect the metal (zinc is less noble than aluminum and provides some degree of anodic protection). Epoxy primer is a whole different animal and will generally apply thicker and take longer to dry, meaning it will likely need to dry overnight before being sanded in preparation of topcoat.
Step 6: Paint selection
After priming it is time to begin the painting process, the first step of which is to lightly scuff up and level the primer surface if outside of the specified recoat timeframe. Paint and primer typically have a finite amount of time that if followed, will allow for a chemical bond between coats. If this is exceeded substantially by allowing for a full cure of the previous coating, the surface must be lightly sanded to ensure proper mechanical bonding. Once the surface is primed and prepped for paint, it is time to choose a paint coating. If doing a DIY job in imperfect conditions, I would not overthink this step one bit: on something like an outdrive that moves through the water—in addition to the likelihood that it will touch bottom in shallow waters—nothing will last forever if applied in non-static conditions.
While there are many options for paint, I personally have found Rustoleum to be the best spray can paint by far. While the High Performance Enamel will work satisfactorily, something like Arcylic Enamel (also offered by Rustoleum) is better. Better still is the Arcylic Lacquer also offered by Rustoleum; however it cannot be applied over existing enamel paints because it contains stronger solvents than the average enamel which could cause existing coatings to bubble and peel.
While a transom assembly with its various hard to reach nooks and crannies is best applied via spray of some form, something like an outdrive, metal hull, running gear, keel, or other large and relatively flat surfaces, may be painted with a brush or roller. In these cases, liquid paint is preferable because it allows for a thicker coat of more robust paint. For the typical DIYer, something like Rustoleum Enamel, Topside Paint, Petit EZpoxy, or equivalent would be a good choice. To make the paint harder, glossier, and more tenacious, an enamel hardener like Valspar Enamel Hardener or Petit EZpoxy Hardener may be added.
Step 7: Paint Application
Once the painting methodology is decided upon and a product is selected, it is time to paint. If applying spray paint from a can, three or four coats applied lightly and evenly within an hour of one another is the best method. While painting, the can should be around six inches from the surface being painted and the can should be shaken and rotated frequently to avoid splattering. While applying, the applicator should move the can back and forth while ensuring overlap of the paint coating. Applicators must not dally in one spot however, as that will lead to runs and a poor paint job. In the first few coats, do not be alarmed by frosting which is caused by not enough paint being applied. Many thin coats are better than fewer thick coats, which take forever to dry—if they ever do dry properly that is. I recommend starting at the top of a surface and working downwards so that the paint has a chance to level as much as is possible with spray paint.
If rolling or brushing, the paint should be mixed with the enamel hardener to the proper ratio and thinned with the proper thinner in the ratio recommended by the manufacturer which is contingent upon atmospheric conditions. Whether applying via roller, brush, or spray can, it is pertinent to paint in dry, warm (but not hot), and stagnant conditions, because wind, dust, and moisture will ruin any paint job no matter how extensive one preps.
While a brush may be used, a foam roller is a much better choice. Foam rollers cause a slight stipple or orange peel, but runs, drips, and brush hairs will be non-existent. For the foam rollers, West System Epoxy solvent-resistant rollers perform the best. Paint thinner will similarly, help the paint “flow” or self-level, thereby creating a monolithic layer of paint with minimal imperfections, but it accomplishes this by slowing the drying time which will allow for insects, dust, and other debris to contaminate the paint job.
If using a brush for either “rolling and tipping” or brush-only, a fine badger hairbrush is widely considered the best (and most expensive) option. When rolling or brushing paint, typically only two or three coats will be required. Still, more numerous light coats are preferable to fewer, thicker coats. Liquid paint will typically take longer to dry (though enamel hardener helps to a degree), which increases the likelihood that this type of paint job will turn into a multi-day affair that requires a light sanding between coats. If one wishes to achieve excellent—rather than satisfactory—results, an average liquid paint job will typically look better and last longer than most spray paint jobs. Either way, the painting of underwater metals is bound to be annual maintenance for the discerning boat owner.
About the Author: Drew Maglio is a writer, marine surveyor, and the owner and operator of Capital Boat Works, a marine repair, detailing, consulting, and training company based in Annapolis, MD. Hailing from South Florida, a love of boating and the ocean was ingrained in Drew from an early age. Drew attended Palm Beach Atlantic University for his B.A. and St. John’s College for his M.A.